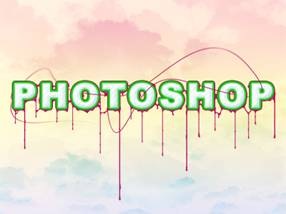
Step 7
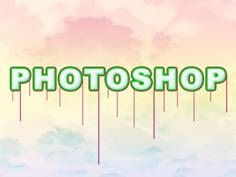
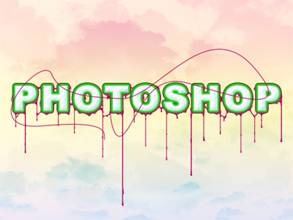
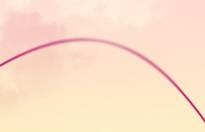
The next few steps will show how to add some goo and drips to the text. Set the foreground color to the purple swatch then create a new layer group named goo directly below the text, still within the foreground group. Create a new layer within this group (Shift+Ctrl+N). Use the line shape tool (U) and create lines like the ones shown here, make some with the weight set at 2px and some with weight at 3px to add some variety.
Step 8
Create a new layer within the goo group. Select the brush tool (B) and use a round brush with a size of 3px and a hardness of 100%. Zoom in to about 400% and draw some droplets at the bottom of each line, also draw some beads of liquid on the line.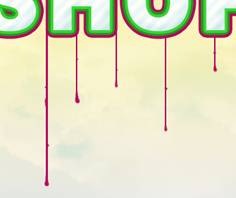
Step 9

Step 10
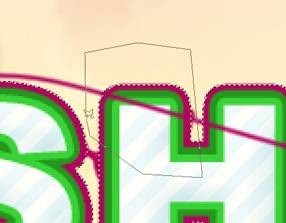
If you try Ctrl+clicking on the text layer you will notice that the selection will not include the border around the text, this will become a problem in the next few steps as you will see. The easiest way to overcome this is to first duplicate the text layer then drag it below the original text, now create a new layer directly below the new text layer then select the new text layer and merge it down (Ctrl+E) then name it 'selection'. Now if you Ctrl+click this layer you will notice the selection covers the border of the text and we also still have our original text which can be edited easily.
Step 11
Step 12
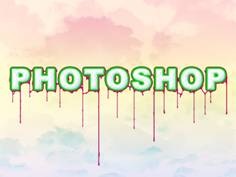
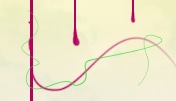
Now select the eraser (E) and use a 100px diameter, 0% hardness and 30% opacity to fade out the end of the line. Also use the blur tool (R) with a similar brush to blur some parts of the line.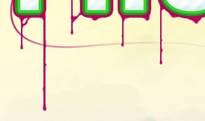
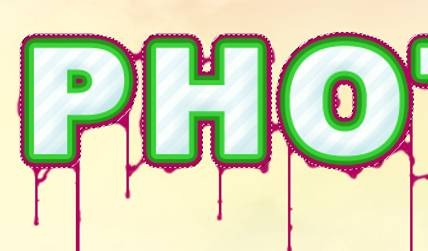
Step 13
Now we will use that layer we created back in step 10 to remove parts of this line accurately. The concept behind this method is to use our selection layer to select all our text then create a new selection manually and intersect these selections, let’s see how it works.First Ctrl+click on the selection layer then select the polygonal lasso tool (L) and in the main toolbar change it to intersect mode. Choose a part of the line that you want behind the text then draw round that part of the text then select the layer with the line in it and hit Delete. So in the image here, I want the line to go behind the left part of the 'H', note that I didn’t draw accurately around the 'H' this is because only the parts included in both selections will become our final selection. Continue using this method for other parts of the line to give the impression it weaving in and out of the text.
Step 14

In this example I used a 1px brush with simulate pressure on.

Step 15

No comments:
Post a Comment