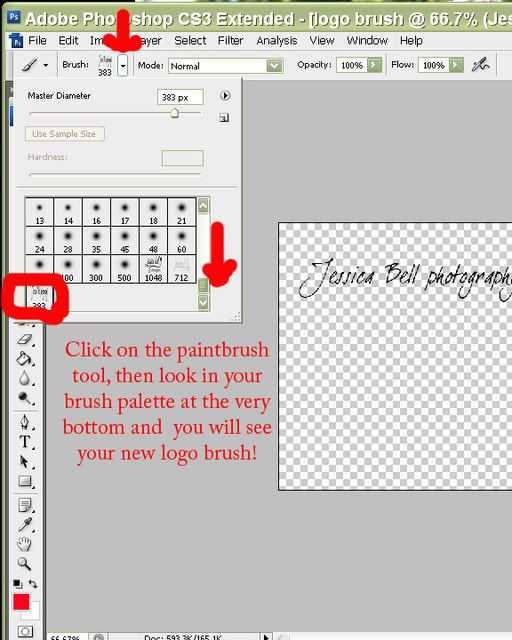
To use your new logo/watermark/copyright brush, just choose that brush from your brush pallette, change the opacity at the top of the screen (if you wish), adjust the brush size, and click on your photo to "stamp" your logo on!
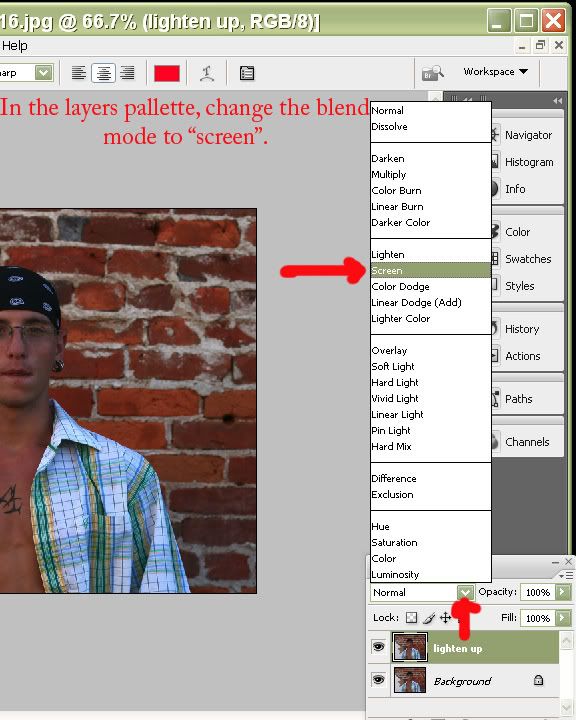
**TIP!** This same basic principle applies to fixing slightly overexposed photos too! Instead of changing the blend mode to "screen", try changing it to "multiply"! :c)
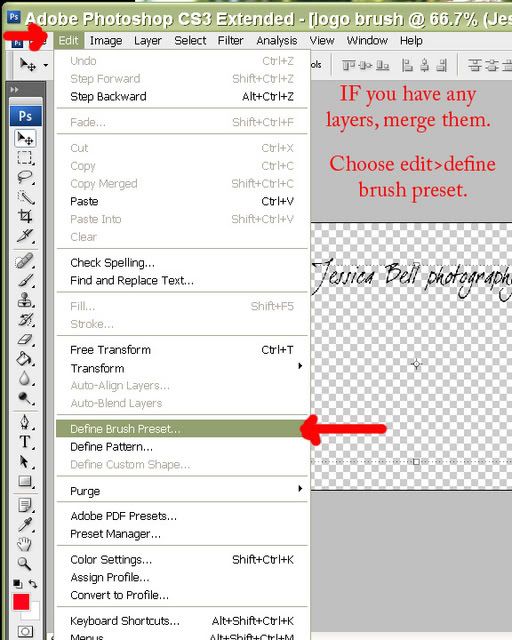
Now just merge or flatten your layers (Ctrl+alt+e to merge layers, or go into Layers>flatten OR Layers>merge visible) and save your new black & white image! :c)
When you are satisfied, just merge or flatten your layers (Layers>merge visible OR Layers>Flatten), apply your sharpening, and save your new vintage image! :c)
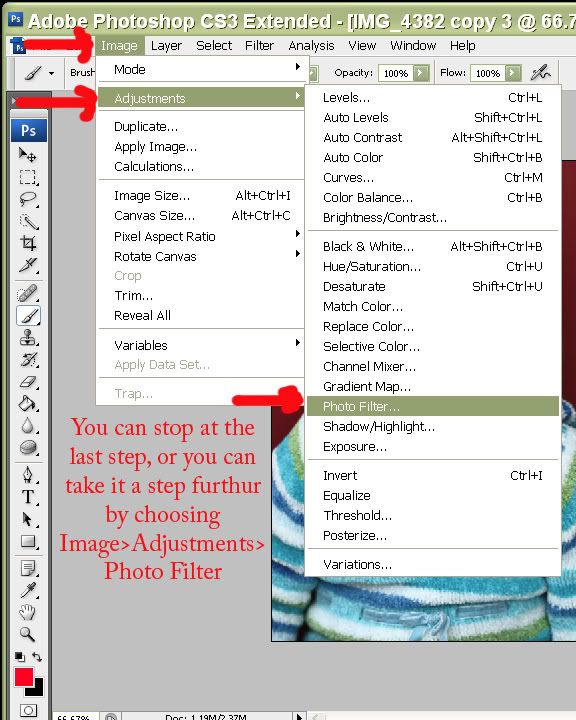
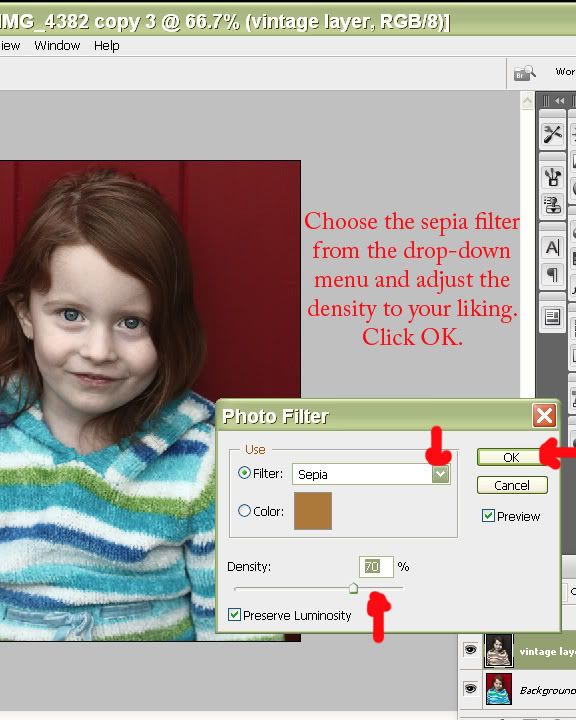
**TIP!** If you leave the opacity on the black/white gradient map layer at 100% and apply the sepia photo filter over it, it makes a very nice looking toned black&white!